When it comes to removing tile adhesive, tackling the task can be as intricate as peeling off a stubborn price tag from a delicate surface. The process requires precision and the right approach to ensure a clean removal without damaging the underlying material. Also Read Manufacturers of Tile Adhesive, Wall Putty & Epoxy Grout
Whether you’ve encountered a small patch of adhesive residue or need to strip an entire tiled area, understanding the methods and techniques for effective removal is crucial. So, let’s explore the steps and strategies to help you successfully eliminate tile adhesive and achieve a smooth finish for your next home improvement project.
Assess the Adhesive Type
- If you’re unsure what type of adhesive was used for your tile installation, a simple test can help you determine the best removal method. To identify the adhesive type, start by examining the color and texture of the adhesive. A dark-colored adhesive that’s hard and brittle is likely a thin-set mortar, while a light-colored adhesive that’s soft and rubbery may be a mastic adhesive.
- Another way to identify the adhesive is by conducting a solubility test. Moisten a cotton swab with acetone or mineral spirits and apply it to a small inconspicuous area of the adhesive. If the adhesive softens and dissolves, it’s likely a mastic adhesive. If there’s no effect, it could be a thin-set mortar.
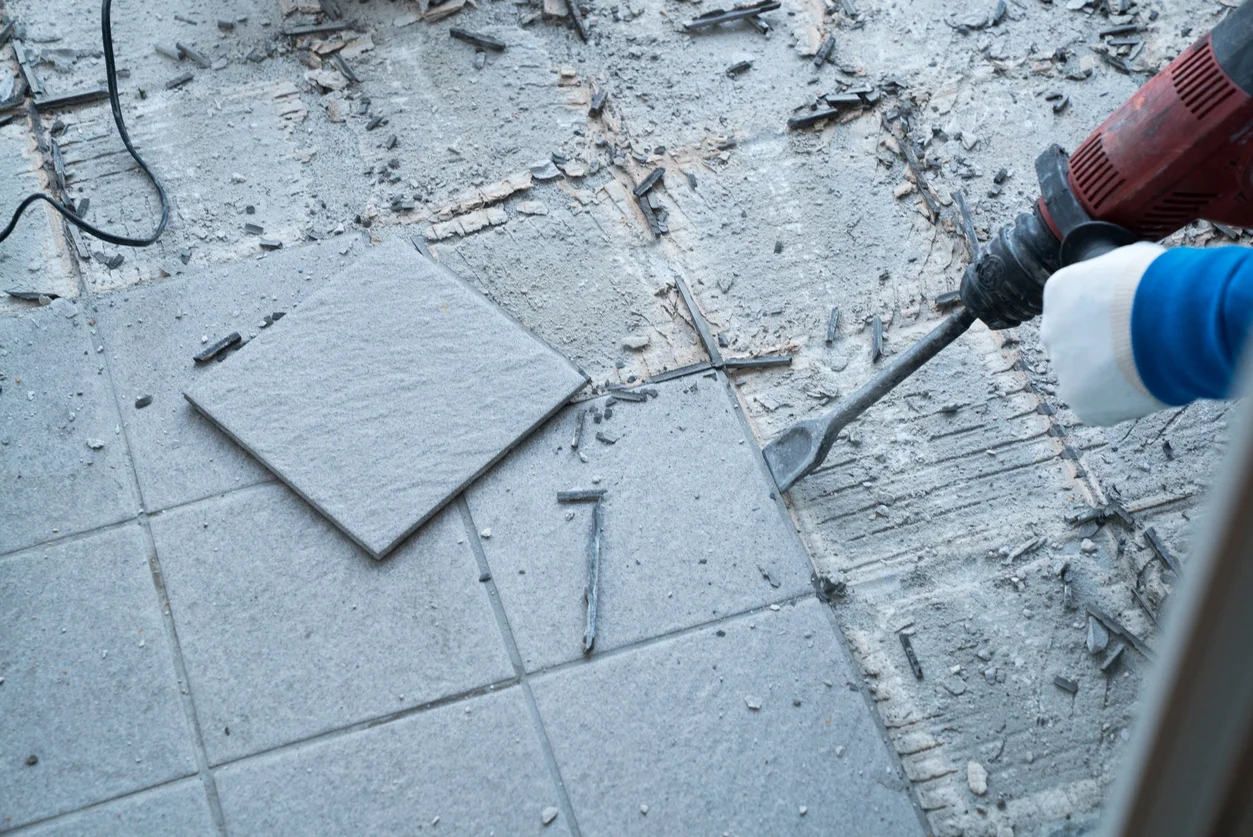
- Proper removal technique depends on the adhesive type. For mastic adhesives, using a solvent-based adhesive remover is effective. Thin-set mortar may require mechanical methods like chiseling or grinding. Always wear protective gear and ensure proper ventilation when working with adhesives.
Gather Necessary Tools
- Begin by gathering the necessary tools for removing tile adhesive efficiently and safely. Safety precautions are paramount when dealing with adhesive removal. Proper ventilation is essential to avoid inhaling harmful fumes. Ensure you have safety goggles to protect your eyes from any debris, a dust mask to prevent inhalation of dust particles, and work gloves to shield your hands from sharp edges or chemicals.
- You will need a few specific tools for this task. A heavy-duty scraper or putty knife will help you lift the adhesive off the surface. A heat gun or a hairdryer can assist in softening stubborn adhesive for easier removal. A bucket, sponge, and warm soapy water will aid in the cleaning process once the adhesive is removed. Additionally, have a trash bag nearby for quick disposal of the removed adhesive.
Prepare the Work Area
- Consider clearing out the work area by removing any obstacles that may hinder your progress in removing tile adhesive efficiently. Before you start working on removing tile adhesive, it’s essential to cover any nearby furniture or items that could be damaged during the process. Use plastic sheets or drop cloths to protect surfaces from dust and debris.
- Ventilation is crucial when dealing with adhesive removers, as some products can produce strong fumes. Ensure there’s adequate airflow by opening windows and using fans to help dissipate any odors and chemicals that may be released during the removal process. If possible, set up a cross-ventilation system by opening windows on opposite sides of the room.
- Additionally, consider wearing a mask to protect yourself from inhaling any potentially harmful particles. By preparing the work area with these considerations in mind, you can work efficiently and safely to remove tile adhesive.
Apply Adhesive Removal Method
- To effectively tackle the task of removing tile adhesive, the next step involves applying a suitable adhesive removal method that aligns with the prepared work area’s safety precautions and considerations. Begin by considering the type of adhesive present on the surface. For adhesive that’s difficult to remove with manual methods alone, a chemical solvent may be necessary. Choose a solvent specifically designed for the type of adhesive you’re dealing with, and always follow the manufacturer’s instructions for proper application and safety precautions.
- When using a chemical solvent, ensure proper ventilation in the work area to avoid inhaling fumes. Apply the solvent as directed, allowing it enough time to penetrate and break down the adhesive. Once the adhesive begins to loosen, use a scraping technique with a putty knife or scraper to gently remove the softened material. Take care not to damage the underlying surface while scraping, especially if it’s delicate or easily scratched. Repeat the solvent application and scraping process as needed until all the adhesive is removed, then clean the area thoroughly to finish the job.
Clean Up and Finish Up
- For a thorough clean up and polished finish, ensure all remnants of adhesive are completely removed from the surface before proceeding with any final touches. Begin by protecting the surrounding surfaces to prevent any accidental damage. Use drop cloths or plastic sheeting to cover floors and furniture. Safety precautions are crucial, so remember to wear protective gear such as gloves and goggles during this phase.
- Once the adhesive is removed, it’s essential to dispose of it properly. Check with your local regulations for guidelines on disposal methods. Clean any tools used in the removal process promptly to prevent the adhesive from hardening on them. Post removal cleanup involves wiping down the surface with a damp cloth to remove any remaining residue. Inspect the area carefully to ensure no adhesive is left behind. To finish up, consider applying a fresh coat of paint or sealer to the surface for a clean and polished look. Remember, proper cleanup and disposal are key to a successful tile adhesive removal project.
Conclusion
After following these steps to remove tile adhesive, you should have successfully completed the task with ease. Remember to always assess the type of adhesive you’re dealing with, gather the necessary tools, prepare your work area, apply the appropriate removal method, and then clean up and finish up. By following these steps carefully and methodically, you can ensure a smooth and efficient tile adhesive removal process.